🌵 azWoodman.com 🌵
Arizona Specialty Woodcrafts
 Building a Basic Workbench . . . Step-by-Step... by Sandor NagyszalanczyEven if you're a wizard with tools, you can't cut a straight line or plane a true edge without a solid surface to work on. A rickety table or wobbly counter can't securely support your work. And with power tools, a shaky surface is downright dangerous. A good workbench is literally "the foundation" of good work. |

What makes a good workbench?▸ First, it should be strong and sturdy▸ The top should be thick enough to withstand pounding ▸ Large enough to handle everything from cabinets to lawn mowers ▸ It should be level and flat so any assembly you do on it will be accurate ▸ It should be the right height for you to stand and work comfortably ▸ And it should be heavy enough so that it won't move or vibrate |
 All these things are easy to achieve with the simple design Sandor provides here. You can build his easy workbench in a couple of hours, with inexpensive materials and ordinary tools. Use his dimensions, or adapt them to your own needs. So here goes ... All these things are easy to achieve with the simple design Sandor provides here. You can build his easy workbench in a couple of hours, with inexpensive materials and ordinary tools. Use his dimensions, or adapt them to your own needs. So here goes ...
This workbench goes together with bolts and screws, so you can disassemble it for storage or moving. The 65" x 32" top is large enough for almost any work, yet it fits into almost any garage or workroom. If you cut the top from a 1" thick sheet of 4' x 8' plywood, you'll have enough left over to make a shelf underneath, plus an optional center brace for extra stiffness. A good material is AC plywood, which has one "good side" (the A face, flat and blemish free) and one flawed side (the C face). A layer of hardboard over the plywood gives you a flat, smooth, splinter-free surface to work on. (It's cheap and durable, and if it gets damaged, you just glue on another layer.) The legs are 4 x 4's. The apron, which connects the legs just under the tabletop, and stretchers, which connect and brace the legs lower down, are cut from standard construction lumber. You can also use plywood scraps, if you like. |
| Tools: | Materials: |
|---|---|
| Hammer | 2' x 6' framing lumber: four 8' lengths |
| Tape measure | 4' x 4' framing lumber: two 6' lengths |
| Drill | Plywood (AC): one 4' x 8' sheet, 1" thick |
| Bit set | 4' x 8' sheet tempered ¼" hardboard (Masonite) |
| Spade bit, ¾" | Circular saw, handsaw or miter saw |
| Framing square | Carriage bolts: 24, ¼" x 5½" |
| Adjustable wrench | Carriage bolts: eight, ¼" x 5" |
| Socket wrench | Nuts: 32, ¼" |
| Clamps | Washers: 32, ¼" |
| Dust mask | Wood screws: 22, 2" long #10's |
| Wood screws: 30, 2" long #8's | |
| Wood glue |
» Step by Step Instructions: |
1. Cut the legs, apron and stretcher pieces.Use a circular saw, handsaw or miter saw to cut four A pieces, four B pieces (one from each 2 x 6), two C and two D pieces. If you prefer a bench that's higher or lower than 36" the height of a typical kitchen counter cut the legs (A) longer or shorter, remembering that the top adds 1¼" to the final height.2. Assemble leg pairs.Use the back side of the plywood sheet as a temporary assembly surface. Lay two legs on the plywood. Next, lay one piece B across the legs so that its ends are flush with the top and outer edges of the legs (see drawing). This piece along with the other three that join it to connect the legs and support the top, form the apron of the bench.With a framing square, check that the pieces are at 90° angles to each other. Then drill pairs of 9/32"- diameter holes through the apron and legs. (If you don't have this size bit, use a ¼" bit and wiggle it to create a hole slightly larger than the bit's diameter.) Position the holes as shown in the illustration, about an inch in from the edges of the legs. Insert four ¼" x 5½" carriage bolts through the apron and legs. Tap each bolt head with a hammer to set it, and then fasten with nuts and washers at the backs of the legs. Use an adjustable wrench to turn the nuts just a ¼ turn past finger tight (you want them a little loose at this stage). Repeat this procedure with a second piece B (a stretcher), placed so that its lower edge is 6" above the bottom of the legs, and on the opposite side from the apron piece (see illustration). This time, run the bolts through the leg and then through the stretcher, again fastening rather loosely. Repeat with the other pair of legs A, short apron B and short stretcher B. |
3. Connect the leg pairs.Set the leg pairs upside-down on the plywood, with the short aprons B facing outward. Clamp the two long apron pieces C in place, overlapping pieces B as shown. Drill two holes through each end, taking care not to hit the bolts already in place. Fasten with 5½" carriage bolts as before.Lay the assembly on its side, mark hole positions, and drill bolt holes for the slightly shorter stretchers D, as shown. The washers and nuts for these bolts will be exposed unless you countersink them. Use a ¾" spade bit to counterbore ½" deep niches in the back side of the legs, as shown, for the nuts and washers to fit into. Use a socket wrench to attach piece D with 5" carriage bolts. Then flip the assembly over and attach the remaining stretcher D the same way. 4. Cut out the plywood and hardboard.Do all your marking and cutting on the back (C side) of the plywood. First, measure 27½" in from one end of the plywood sheet, and cut along the line with a circular saw. This piece (48" wide) is the lower shelf. Next, cut two 1¼" pieces across the 48" dimension of the plywood; these will be the cleats you'll use to attach the top. Now, measuring from one of the two remaining original corners (corners cut at the factory), lay out and cut the top (65" x 32"). Cut the hardboard to match it. Finally, from the remaining plywood, measure and cut the center brace, which is optional but recommended. This piece should be 5½" x 53½" but just to be sure, measure the distance between the short apron pieces and cut the brace to fit the actual dimension. |
5. Add the top and shelf.Lay the leg assembly on its side and glue and screw a cleat to the inside surface of the long apron piece C, keeping it flush with the top edge. Use six 2" #8 screws, evenly spaced. Attach the other cleat the same way.Now place the bench top, with its good side down, on your garage floor or other flat surface. Center the leg assembly on it, and glue and screw the leg assembly to the top, fastening through each cleat into the top with six 2" #10 screws. Don't apply glue to the tops of the legs: that way, to take the bench apart later, you can just remove the bolts that connect the legs and the apron. Now glue the center brace to the center underside of the top. Drive two 2" #10 screws through pieces B into the center brace at each end, but don't glue this connection. Stand the assembly on its legs and drive six more of the same screws through the top and into the brace. Now set the hardboard in place on the floor, good side down. Spread an even layer of glue over the hardboard. (An old credit card makes a good spreader.) With a helper, invert the bench assembly and set it on the hardboard. If some glue squeezes out, wipe it up with a damp rag. Make sure the pieces are in position, and leave them to dry overnight. |
6. Add accessories and put the bench in place.When the glue is dry, flip your bench upright, and attach the shelf with 2" #8 screws, six on the long edges, three on the short edges. Round any sharp edges with sandpaper or a file. If you plan to do a lot of gluing on your bench, give the top a coat of paste wax. The wax causes water-based glue to bead up and makes the top easier to clean.Before you move the bench into position, mark and drill for your bench vise, woodworking vise or other hardware you wish to mount. Usually a vise goes at the left front corner of the top, but you can mount it elsewhere if it feels more comfortable to you. Use suitable nuts and bolts to attach the vise. If a mounting hole lands atop apron or leg, use a lag screw driven in from the top to secure it. With a helper, set your new bench in its final location. Make sure all four legs are firmly on the floor and then tighten all the carriage bolts. The slight amount of flex in the assembly should help compensate for a floor that's not quite level. If this doesn't do the trick, shim one of the legs with a shingle. If your lumber is green, you may need to retighten the bolts after it dries out completely. Now you can stand back and admire your handwork for a moment before you dive into that backlog of home improvement projects. Take heart, however ... you've already made a solid foundation for every job. |
❖ Sandor Nagyszalanczy(pronounced Shawn-door Not-sa-lon-see) As a spokesman for Fine Woodworking Magazine, Sandor presented numerous lectures and seminars on a variety of woodworking topics, and served as a juror for several major woodworking exhibitions in the U.S. and Canada. He also served on selection committees for Taunton Press' Design Book Four and Design Book Five, and acted as the Associate Editor of Design Book Six. With 23 years of experience designing and building custom furniture and cabinetry, Sandor is the author of several books on tools and woodworking ... in association with amazon.com: As a spokesman for Fine Woodworking Magazine, Sandor presented numerous lectures and seminars on a variety of woodworking topics, and served as a juror for several major woodworking exhibitions in the U.S. and Canada. He also served on selection committees for Taunton Press' Design Book Four and Design Book Five, and acted as the Associate Editor of Design Book Six. With 23 years of experience designing and building custom furniture and cabinetry, Sandor is the author of several books on tools and woodworking ... in association with amazon.com:
▸ New Built-Ins Idea Book ▸ Setting Up Shop ... Designing and Building Your Dream Shop ▸ Tauntons Complete Illustrated Guide to Jigs & Fixtures |
📌 We are a participant in the Amazon.com Services LLC Associates Program, an affiliate advertising program designed to provide a means for sites to earn advertising fees by advertising and linking to Amazon.com.
❈ Build Your Own Worbench Plans:
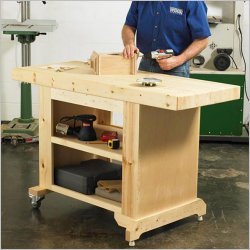
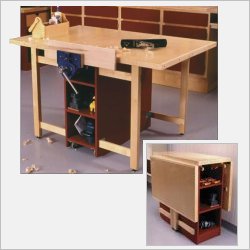
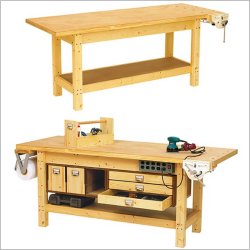
Interested in updating your shop? These workbench project plans include detailed instructions, easy-to-read illustrations, color drawings, how-to photographs, a bill of materials, and all the information needed to build these workbenches. Here are just a few designs to choose from ... ↓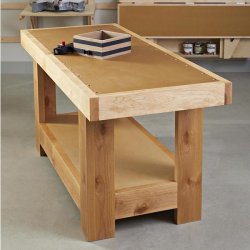
![]()