❈ How To: Evenly Stain Wood... using Wood Stains, Pigments, Dyes and Toners |
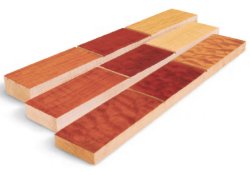
 Even using the same stains and woods doesn't necessarily mean the patterns or even colors will match across different pieces. Build a project from a single board and the finished piece will be visually consistent. Use several different boards, even of the same species, or mix solid wood and plywood, and you may end up with an array of glaring color surprises once the finish goes on. Stain can mitigate color differences, but it may not erase them completely. In fact, the stain may accentuate the differences, creating a more obvious mismatch from board to board. Fortunately, using the right stains in the right order can help blend errant color challenges. Even using the same stains and woods doesn't necessarily mean the patterns or even colors will match across different pieces. Build a project from a single board and the finished piece will be visually consistent. Use several different boards, even of the same species, or mix solid wood and plywood, and you may end up with an array of glaring color surprises once the finish goes on. Stain can mitigate color differences, but it may not erase them completely. In fact, the stain may accentuate the differences, creating a more obvious mismatch from board to board. Fortunately, using the right stains in the right order can help blend errant color challenges. |
⦿ First Step: DyeOf the two major types of stain, dye, which goes directly onto sanded, raw wood, usually does a better job of blending color and grain differences than do the more common pigment stains. Try staining oak, maple and pine with the same color of pigment stain and dye stain. The dyed portions will look a lot more similar than the pigment stained ones. That's because the color particles are vastly smaller: small enough so they don't just lodge in the large pores, but color universally.While any stain makes wood darker, dye's semi-transparent nature also lets you make wood lighter, or at least brighter, without becoming muddy. This is handy for blending woods like steamed walnut. A weak dye stain of water-soluble amber or reddish-orange dye will add highlights that reduce a wan, gray look to give walnut a brighter, richer base tone. In many cases, dye alone will yield the uniformity and color you want. If not, you can move on to the next step. |
⦿ Second Step: PigmentWhile dyes color background wood evenly, they may leave deep pores of woods like oak or ash lighter. Stain made with 100% pigment, also called wiping stain, can correct that by filling those pores with matching color. This stain is also great for adding extra color on boards that are consistent in color, either naturally or after being dyed. This two-step approach of dye, then pigment, does an outstanding job of blending mismatched woods. It's also a way of adding extra color to dense woods, like maple, that are sometimes a bear to get dark enough. |
⦿ Third Step: TonerIf the color is still not dark enough, or if you have sections that are too light, toner is the perfect next step. Toner is clear finish tinted with color. It's sold as one-step stain and polyurethane in either cans or aerosols, and as shading lacquer in rattle cans. You can also mix your own by adding small amounts of compatible dyes or pigments to your topcoat. Apply toner selectively on lighter colored areas, or uniformly to add color overall, but apply it sparingly. Build up too much toner and you can obliterate the wood beneath, turning beautiful wood into what looks like a solid painted surface. |
▸ Copyright © Rockler.com - Posted on June 1, 2011 by Michael Dresdner This article originally appeared in Woodworker's Journal Magazine |

You'll learn step-by-step as you work your way through 51 proven and easy-to-follow finishing exercises. ▸ Buy the Book

The latest technical updates on materials and techniques - from spray guns to French polishing. ▸ Buy the Book