🌵 azWoodman.com 🌵
Arizona Specialty Woodcrafts
❈ The Enigma-e Wood Box Kit
This is a tutorial we put together for a client on how to assemble the Enigma-e Wood Box Kit we made for him.
Please note that we closed our shop in 2015, and we no longer build these box kits or any other custom box. ~ Dan & Deb McBride
❈ Client Testimonial:
![]() Deb and Dan did a fantistic job on my box. It was a special box for an electronic project. Dan did all the design and produced the first article box way ahead of schedule. Great quality too. ~ PS from Colorado
Deb and Dan did a fantistic job on my box. It was a special box for an electronic project. Dan did all the design and produced the first article box way ahead of schedule. Great quality too. ~ PS from Colorado
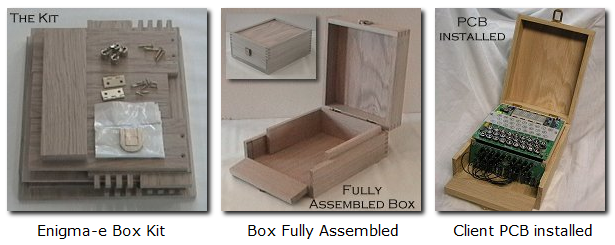
❈ The Unfinished Wood Box Kit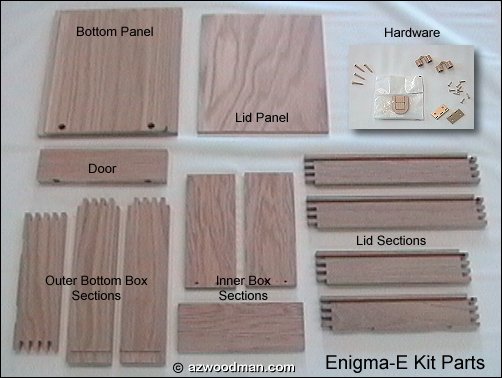
This Kit includes the following Parts:▸ Wood Used: White Oak▸ Lid Sections ▸ Lid Panel ▸ Outer Box Sections ▸ Bottom Panel ▸ Inner Box Sections ▸ Front Door Panel ▸ Hardware: - 10mm Barrel Hinges - Brass Butt Hinges - Brushed Brass Clasp - Screws included |
❈ Enigma-E Box Kit Assembly Instructions |
Step 1: Inner Box Assembly |
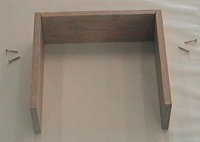 ▸ Assemble box with (4) # 4 x 3/4" screws.
▸ Do not apply glue at this time. 🔆 Applying wax or soap to the screw threads will help the srews go into the Oak easier. |
Step 2: Lower Outside Box Assembly |
| ▸ Apply glue to finger joints and assemble. ▸ Insert inner box to make sure you get a proper fit. ▸ Use the front door as a 'spacer' only while gluing and clamping. ▸ Once clamped, remove inner box. ▸ Leave door in while glue dries, then remove later. |
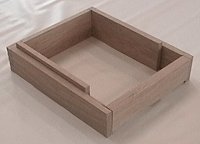 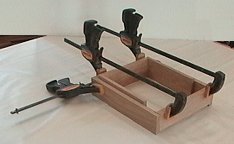 |
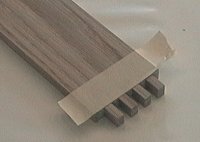 Tape is then removed while glue is still wet, leaving nice, clean inside corners. |
Step 3: Lid Assembly |
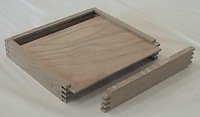 Apply glue and make sure your 1/4" veneer panel is in place before clamping.
🔆 A good idea is to clamp top and bottom at the same time for proper alignment. |
Step 4: Lower Outside Box Bottom Assembly |
| ▸ Attached assembled box section to the bottom panel. ▸ Make sure front edges are even with bottom panel. |
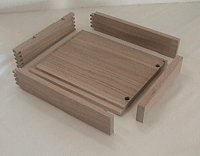 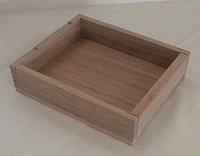 |
| 🔆 You may want to put your door in place using small pieces of paper on each side for spacing before gluing, screwing or nailing the bottom on. This will insure that the door fits properly. |
Step 5: Securing Inner Box to Outside Box |
 After the bottom panel is on, you can secure the inner box to the outer box using glue, screws or nails. After the bottom panel is on, you can secure the inner box to the outer box using glue, screws or nails.
🔆 It would be a good idea to position the PCB's making sure you have clearance for any and all interior electrical components, wiring, etc. Additional notching may be required for proper fit. |
Step 6: Front Hinges Installation |
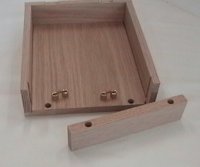
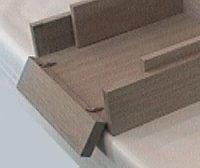
| ▸ The 10mm barrel hinges are used for the front door. ▸ These are easily pressed in or tapped in using a large nail-set tool. ▸ Each hinge has a 'set screw' that will need to be loosened prior to insertion. ▸ After installation, tighten the screws. (add'l barrel screws may be included) 🔆 Once these hinges are in, do not attempt to remove these hinges! Doing so may result in damage to the hinge and/or the box. |
  |
Step 7: Back Hinges Installation |
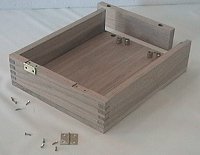
| Standard butt hinges are used for the lid/back of box. They have been pre-drilled for easy installation.
(NOTE: Hinges with 'rounded corners' may be used in place of the ones shown here.) |
 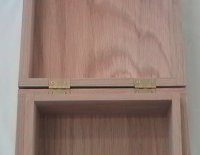 |
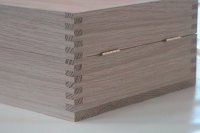 🔆 We suggest clamping the box together, then do the finish sanding on the 'back side only' prior to installing the butt hinges. 🔆 We suggest clamping the box together, then do the finish sanding on the 'back side only' prior to installing the butt hinges.
It is more difficult to sand around these hinges once they are in place. |
Step 8: Putty, Sanding & Finishing |
| ▸ With everything in place, you can now proceed with the wood filler or putty. ▸ Finish sanding on the sides, front and bottom. ▸ Apply whatever stain, lacquer, varnish, etc. |
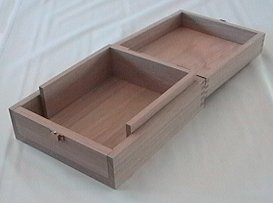 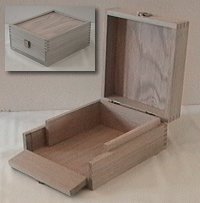 |
Step 9: Front Catch Installation |
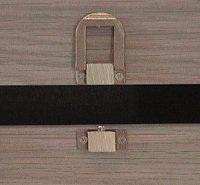 You might want to have all the finish work done before attaching the front catch. To ensure proper alignment, we decided not to 'pre-drill' for the latch screw holes. Postion it where you want it, mark and pre-drill the screw holes, then attach the catch. Again, using wax or soap on the screw threads will make inserting the screws much easier. You might want to have all the finish work done before attaching the front catch. To ensure proper alignment, we decided not to 'pre-drill' for the latch screw holes. Postion it where you want it, mark and pre-drill the screw holes, then attach the catch. Again, using wax or soap on the screw threads will make inserting the screws much easier.
Content Copyright © ~ Arizona Specialty Woodcrafts |