❈ Dovetailed Chestnut Tool Chest🔎 View PDF File | |
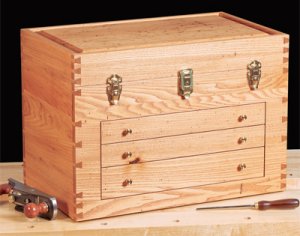 When Chris Marshall got the chance to work with unused chestnut from Harry Kottke's shop, he jumped at the chance to make this tool chest. |
 A hundred years ago or so, when the chestnut for this project was still gracing the Ohio landscape, a tool chest was much more than a place to store chisels. It was a woodworker's calling card. A hundred years ago or so, when the chestnut for this project was still gracing the Ohio landscape, a tool chest was much more than a place to store chisels. It was a woodworker's calling card. Journeymen were often required by their master teachers to build a tool chest before venturing out to start their own businesses. And when that time came, a finely crafted tool chest was proof to prospective clients that a craftsman's skills could be trusted. |
| These days, you can buy a chest of metal drawers to store your hand tools, but what fun is there in that? It's much more gratifying to build a custom chest, just like our forebears did. Yours may not help you hang out that woodworking "shingle," but it definitely will remind you of all the things you love about this craft each time you open it. | |
⦿ Design Considerations | |
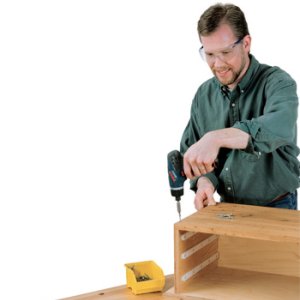 The drawer case in the chest forms the floor of the top compartment, houses the drawers and acts as the bottom of the chest, making it the best starting point for making the chest. |
My design is essentially a chest within a chest: an internal case houses three drawers and serves as the floor of a deep storage compartment on top. The drawer case is undersized to make room for three racks of hanging tools around the inside.
You can outfit the rest of the top compartment any way you like with divider strips. It's a perfect place to store tall-handled planes. A handmade chest deserves fine joinery, so I chose variable-spaced through dovetails to bring the outer chest together and half-blind dovetails for the drawers. Top it all off with a coved lid and some brass hardware, and you've got a challenging project that will keep you plenty busy for a few weekends. Starting with the drawer case the best tactic for building this project is to work from the inside out, so we'll start with the drawer case. |
| Since the top of the drawer case (piece 1) will show when the chest lid is up, make that from a panel of solid wood. I chose Baltic Birch Plywood for the case sides, back and bottom (pieces 2 through 4) to eliminate any wood movement that might bind the tight-fitting drawers from season to season. | |
| Notice in the drawings that the drawer case bottom panel also serves as the chest bottom. It nests into grooves in the outer chest panels with a 5/16"-thick, 1/2"-long tongue. Make that tongue now on the bottom panel ends and back edge; the front edge will butt against the chest front, so leave it flat.
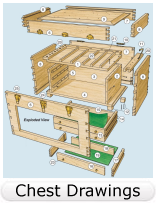
You'll also discover 🔎 in the drawings that the drawer case "hangs" on the chest's front panel with six pocket-screw joints. They form invisible, sturdy connections, but they also offer you the ability to position the drawer case precisely in the drawer opening. You'll want that degree of control here, since the drawers are flush-fitting with only a sliver of clear space to spare around them. Bore the pocket-screw holes in the drawer case sides now. | |
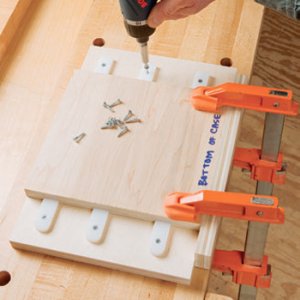 The drawer runners are the most difficult part to make adjustments to once they're placed, so make sure they're accurate, the author used a simple jig to guide the cuts and installation. |
The drawers slide on fixed runners (pieces 5) inside the drawer case. I experimented with self-lubricating plastic slides for my chest, but you could fashion yours from straight-grained, dimensionally stable stock, too. Prepare your drawer slides, rounding over their front ends to double as drawer stops. Once the drawer case goes together, you won't be able to tweak the position of the runners to improve drawer action, so it's crucial to install them parallel and accurately from the start. Easiest solution? Build a simple jig to hold the runners in place on the case sides when you install them. I made mine from scrap and milled three dadoes that fit the runner strips snugly. A fence along the bottom of the jig made it easy to register the jig correctly when I drove the short attachment screws (pieces 26). |
| Here's another tip: the case sides are mirror opposites of one another. The rounded ends of the runners should face in opposite directions on the right and left side panels. With all your drawer case parts machined, sand and pre-finish them, then assemble the drawer case with flathead wood screws (pieces 27). | |
⦿ Making the Chest PanelsThe "show" faces of your chest panels (pieces 6 through 8) will make quite an impression on a project this large, so take time to choose your stock carefully. Plan your panel glue-ups for pleasing grain pattern and consistent wood tone. I made all four panels from one piece of thick, wormy chestnut, resawn into thinner stock. For my front panel, I wanted the grain pattern to flow across the drawer faces, and I knew I'd need a precise cutout for the drawer opening. The easiest way to accomplish both goals was to start out with an overly wide panel and rip my drawer face blank from it. If you do the same, remember to make your drawer face blank wide enough to account for the kerfs you'll need to split the blank into three drawer faces later. Once the drawer face blank was removed, I cut off its ends and glued them to the rest of the front panel to create the final drawer opening shape (see drawings). | |
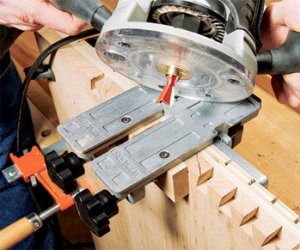 To allow for some variety in how the dovetails were placed and cut, the author used a ChestMate Dovetail cutting jig. |
Milling the through dovetail joinery was easy, thanks to my ChestMate™ Jig, which will cut through dovetails on panels of any size. I decided to configure the joinery so the pin geometry would show on the front of the chest. A pleasing pattern was my foremost goal, but the layout posed a minor challenge during assembly: I needed to nip the front corners off the drawer case bottom tongues so the side panel dovetails could slide correctly into their sockets in the front panel. If you choose a different dovetail layout, you may be able to avoid this step. Once your dovetails are cut and the panels slip together with a nice friction fit, step to your router table and mill slots for the chest's top panel and the drawer case bottom tongues. A 1/4" and 5/16" straight bit will get these jobs done. |
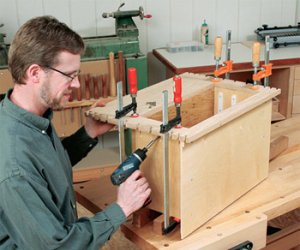 Once it's assembled and clamped, with the drawer case aligned with the drawer opening, then drive your 1-1/4" pocket screws into the joints. |
Again, depending on the spacing of your through-dovetail layout, these slots may need to be stopped drop cuts or run from one end of the panel to the other. Plan accordingly. Sand the inside faces of your panels up to 180-grit, and apply your finish now. Once the chest is glued up, these surfaces will be tough to reach. When the finish cures, line up the drawer case with the drawer opening on the chest front panel, and drive the pocket screws (pieces 28) home to attach these parts. Make sure the inside faces of the drawer case line up nicely with the opening. Be really picky here. |
⦿ Bringing the Chest Together | |
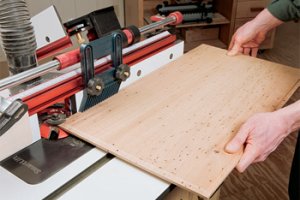 Add a gentle, sloping cove cut in the top panel, which makes an attractive shadow line and breaks up the blocky shape of this large chest. |
One step stands between you and the big glue-up to come: making your chest top panel (piece 9). Mine came from one blank of 19"-wide wormy chestnut, ripped and reglued to flatten it during the surfacing process. I milled gentle, sloping coves all around the panel edges with a panel-raising bit on the router table. If you don't have a big panel raiser, you could cut broad bevels around the top face using a table saw instead. Sand and finish your top panel before proceeding. That way, no bare wood will show if the panel shrinks slightly or shifts in its grooves over time. |
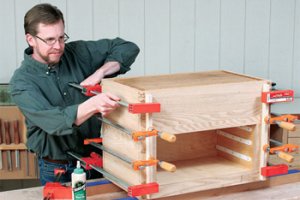 Test your assembly before applying any clamps or glue, because you will only get one good shot at fixing these dovetails. |
It's imperative to carry out one final dry assembly to be absolutely sure everything fits together as it should. Once that glue hits the dovetails, there's no turning back. Be sure to have plenty of clamps and cauls ready. Work quickly but carefully to make sure all the joints close properly and the chest is square before the glue sets. |
⦿ Freeing, then Mounting the Lid | |
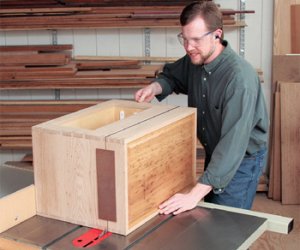 To separate the lid from the rest of the piece, make four rip cuts, bridging them with carpet tape and strips of scrap board to keep the lid from moving during the cut. |
Your next order of business is to separate the lid from the chest carcass with four rip cuts on the table saw. I made the two shorter end cuts first, with my blade set just high enough to cut through the panel thickness. Then, I applied a couple of strips of double-sided tape and scraps of hardboard across these cuts to form "bridges" that would hold the lid securely during the next two long rip cuts. You don't want the lid to shift even slightly during cutting. Make sure your rip fence is tuned up and your blade is square so all four of these cuts line up accurately when you're though. Pop off the hardboard, clean up the cut surfaces with a block plane and mount your lid to the chest with a pair of quality brass butt hinges (pieces 10) set into mortises. I cut the mortises with a trim router, straight bit and guide collar, following a shop-made template. |
| Now make the chest's block feet (pieces 12), chamfering their bottom edges. Install them with pairs of 2" screws driven into counterbores. | |
⦿ Assembling the Drawers | |
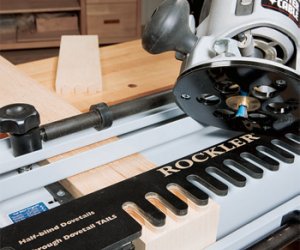 To add detail to the chest, create half-blind dovetails in the drawers, using a jig (like this one from Rockler) to guide the cuts. |
Set the chest aside for a spell, and turn to drawer construction. Rip the drawer faces (pieces 13 and 16) from the blank you created earlier, and make up your drawer sides, backs and bottoms as well. Here's a fitting opportunity to choose an attractive secondary wood for the drawer sides - it will make those half-blind dovetails impossible to miss! I used ash, which creates a pleasing blonde contrast to the chestnut's warm brown color. Rockler's Dovetail Jig made quick work of cutting half blinds. Then, I routed the drawer bottom grooves in the sides and faces and plowed dadoes for the drawer backs. |
| Once the drawers are glued-up and dry, slide the bottoms into place and pin them to the drawer backs with a few brads. Next, take the drawers to your router table and mill a stopped dado in each side for the drawer runners. Use a 3/4" straight bit for this task. | |
| It's sensible to refine the setup on scrap stock first to make sure the slots are centered on the drawer side widths and just wide enough to permit smooth sliding action. I found that two passes for each dado, flipping the the drawer in between, widened them just a hair to create the perfect fit over the runners. Sand and finish the drawers to complete them. | |
⦿ Detailing the Top Compartment | |
| As I mentioned initially, this chest has three tool racks (pieces 20 and 21) that surround the deep top compartment. They're helpful for stowing your chisel set, measuring and marking tools, awls, screwdrivers and so forth. How you lay them out will depend on the tools you own and the sizes of openings they require. In my chest, the short left rack holds a set of chisels and a burnishing tool. To fit them, I drilled 5/8" holes that seat the tapered handle ferrules, ripped the rack down the middle, then added short spacers between the holes to create blade openings. I'm devoting the back long rack for flat-ruled tools. It started out as a single blank, ripped in two, then I cut shallow dadoes to create the narrow tool blade openings and glued it back together. The short rack on the right holds an awl, scribing gauge and a compass, each fitting into appropriately sized through holes for the tool shafts. Very simple, but effective, storage. | |
 To install these racks, drive a pair of countersunk wood screws across the width of each and into the chest sides. That way, if a tool ever slips down inside accidentally, you can unscrew the rack and retrieve it without hassle. To install these racks, drive a pair of countersunk wood screws across the width of each and into the chest sides. That way, if a tool ever slips down inside accidentally, you can unscrew the rack and retrieve it without hassle.For the rest of the top compartment, I divvied up the space with thin strips of stock (pieces 22) to separate five different hand planes, a pounding mallet, mortising gauge and a pair of bevel gauges. I tacked these strips in place with 23-gauge pin nails rather than using glue and screws. If I ever want to change the configuration or collection of my tools, the strips will be easy to remove and reposition or replace. | |
⦿ Finishing Up | |
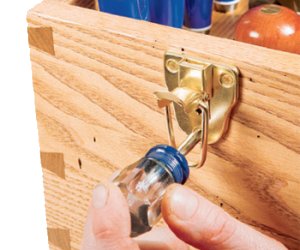 With the chest complete, add a liner and the exterior hardware to complete the construction of the chest. |
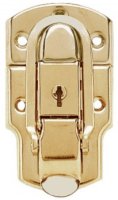
With your tool racks installed, you can mount the brass lid support (piece 11) to the right-hand tool rack. See the drawings for more information about positioning the lid support. Give the outer chest surfaces a thorough sanding, and ease the corners and sharp edges with a few swipes of a block plane. Apply your finish, and install the locking drawbolt, catches and drawer knobs. You might even want to line the drawer bottoms with dark green felt to give your chest a bit more color. Virgin American Chestnut isn't a wood that will pass through my shop very often, so this was a special opportunity for me. I'm sure you have some prized stock that needs just the right project. I hope this chest will be a worthy candidate. |
🔎 View PDF File
| |
📌 Content © Rockler.com ~ The product links on this page are available at Rockler.com.
